
Authentication Service - Configure SAML SSO With Microsoft Entra ID
IntegrationMicrosoftAzureAD_ConstantlyEvolving
2024.1+
SSO (Single Sign-On) configuration requires you to register a Web app on the Azure portal. The registration of the Web app establishes a validated connection between the app and the Microsoft Entra ID (formerly known as Microsoft Azure Active Directory) Identity Provider.
Notes
- You should save the credentials throughout the entire procedure. They will be required for configuring the Identity Provider.
Prerequisites
- You must have an Azure subscription. If this is not the case, you can create a free account (
 see the procedure), or you can buy an Azure Pay-As-You-Go subscription.
 - You must have the relevant accounts and access rights to the services you want to interface with on the Azure portal.
Procedure: How to configure SAML SSO with Microsoft Entra ID
In Microsoft Entra ID
Register an Entra ID application on the Azure portal
RegisterApp_Procedure
Step 1: Access the Azure portal.
1. Log in to the Azure portal using your Azure account.
2. (optional) Select the relevant environment if you have multiple tenants.
Step 2: Register a new application on the Azure portal and retrieve the ID.
1. Search for the App registrations service in the list of Azure services or click the link below to access the service directly.
Microsoft Azure: App registrations
The list of Entra ID applications previously registered on the Azure portal will appear.
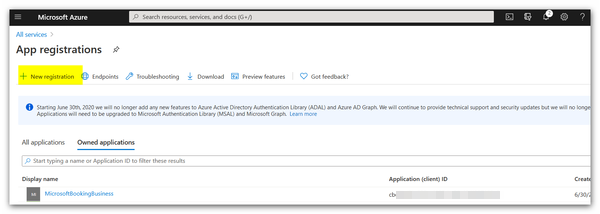
2. Click + New registration.
The properties window will appear.
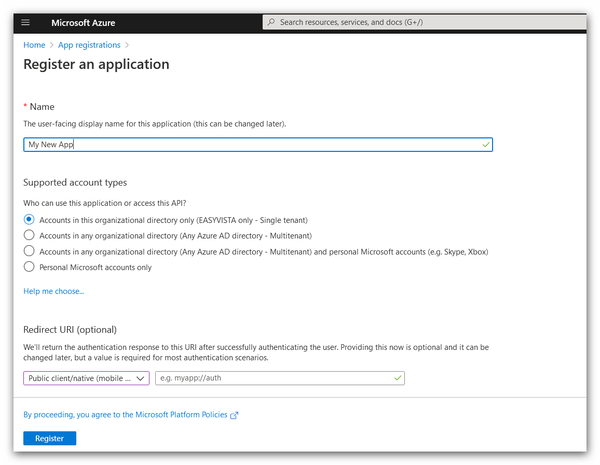
3. Specify the information required for registering the application.
- Name: Name of the application. Note: This name is not used by the third-party product.
 Enter a meaningful name that will enable you to identify the application easily in the dashboard on the Azure portal.
- Supported account types: Used to specify who can use the new application.
- Select the option called Accounts in this organizational directory only. This means that only accounts in your organization will be able to access the application (multitenant or single tenant).
4. Click Register.
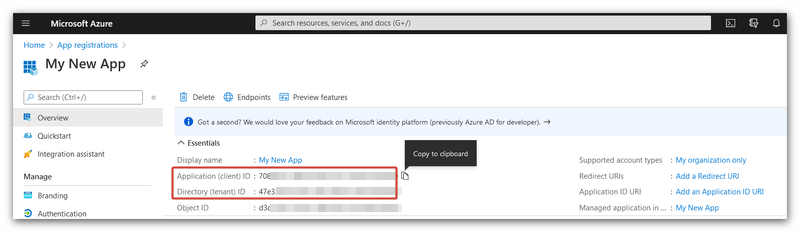
- The Entra ID application will be created and registered on the Azure portal.
- Its IDs will be displayed.
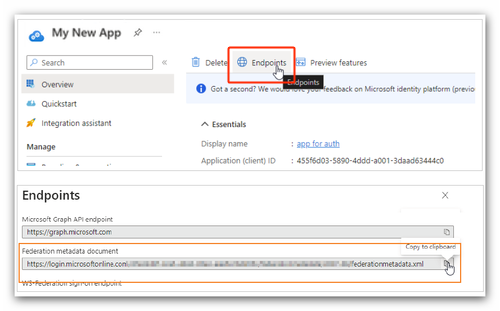
Retrieve federation metadata
1. Select the Endpoints tab.
2. Retrieve the URL in the Federation metadata document field.
- Hover over the field and click
 to copy the URL.
 - Paste the value in your text editor to store it temporarily.
Expose the app API
1. Select Expose an API in the left pane and click Add next to the Application ID URI field.
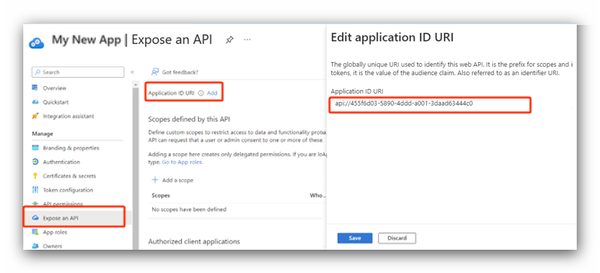
2. Click Save in the right pane.
The URI of the app ID will appear.
3. Retrieve the URI.
- Hover over the field and click to copy the URL.
- Paste the value in your text editor to store it temporarily.
In the Authentication Service
Configure the SSO
1. Select the SSO menu.
2. Click + Add.
3. Enter the information on the new SSO.
Protocol screen
- Select the SAML2 protocol.
Setup screen
Entity ID: Copy the Entra ID Application ID URI you stored in your text editor and paste it here.
IDP Metadata URL: Copy the Entra ID Federation metadata document you stored in your text editor and paste it here.
Select the refreshment interval for the data.
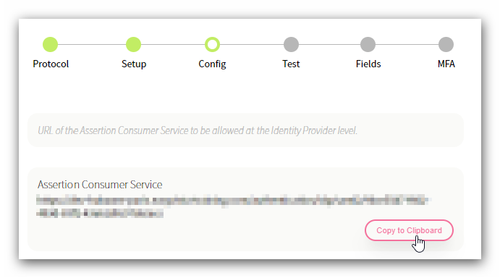
Configuration screen
- Retrieve the information required for configuring the redirect URI of the Entra ID application.
- Hover over the Assertion Consumer Service field and click Copy.
- Paste the value in your text editor to store it temporarily.
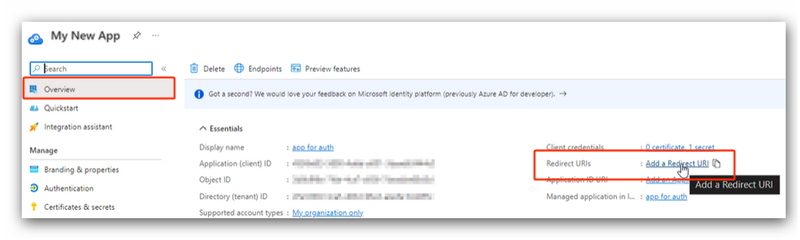
- Return to the Entra ID application.
- Select Overview in the left pane and click Add a Redirect URI in the Essentials section.
- Click Add a platform and select the type of Web platform.
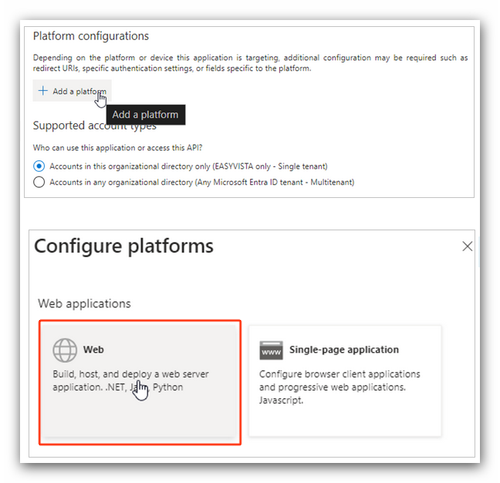
- Copy the Assertion Consumer Service URL you stored in your text editor and paste it here to specify the redirect URI.
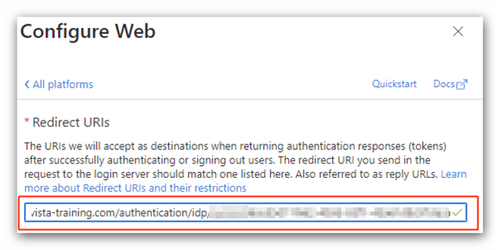
- Click Configure.
- Select Overview in the left pane and click Add a Redirect URI in the Essentials section.
Test screen
- Click Test Sign in to run the new SSO.
- The SSO will run.
- The results of the test will appear.
Fields screen
- Map the elements retrieved by the SSO, i.e. information on the logged-in user, with fields in the database.
MFA screen
- Specify whether multi-factor authentication (MFA) is enabled (
 ) or not (
 ).
). - If MFA is enabled, specify the fields to configure it. See the description
5. Click Finish.
The new SSO will be created.
Associate the SSO with a rule
1. Select the Rule engine menu.
2. Hover over the rule in the list and click  .
.
The modification wizard will appear.
3. Click Next to proceed to the SSO screen.
4. Select the SSO you configured earlier.
5. Click Finish.